What, if there was a Tool helping you to identify possibilities to improve your Microsoft 365 tenant security?
Good news; There is a tool.
Better news; It’s easy to use.
& best news; It’s free and open source.
It’s named Maester and is based on Powershell.
Requirements
- Microsoft.Graph.Authentication Module (v2.2.0)
- Pester (v5.5.0)
How to install Maester
To install the Powershell Module you need to execute following commands:
Install-Module Pester -SkipPublisherCheck -Force -Scope CurrentUser
Install-Module Maester -Scope CurrentUser
After that, you create a directory named maester or a name you want to.
change the working directory to the created directory and execute:
Install-MaesterTests .\tests

After that you are good to go for executing your first Assessment.
How to run a Report
Running the first assessment is nothing more than easy.
1. Connecting to Microsoft Graph
2. Run the test
You need following Permissions in Entra ID to run the Script:
- Directory.Read.All
- Policy.Read.All
- Reports.Read.All
- DirectoryRecommendations.Read.All
If you execute connect-maester the scopes will be automatically set to the required ones.
By using Get-MtGraphScope it will expose which permissions are consented by executing Connect-Maester.
This is very useful because the tool will expand and shrink the required scopes.
Connect to Maester
Connect using the default scopes:
Connect-Maester
Connect using the default scopes + send mail as user:
Connect-Maester -SendMail
Connect using the Graph SDK:
$scopes = @(“Directory.Read.All”,”Policy.Read.All”,”Reports.Read.All”,”DirectoryRecommendations.Read.All”,”Mail.Send”)
Connect-MgGraph -Scopes $Scopes
At the first login you need to approve the permissions as you already know it from other frameworks.
Run the default security assessment
You can run the default security assessment pre-defined by running:
Invoke-Maester
It will output the Report under .\test-results.
By executing Invoke-Maester -OutputFolder C:\temp you can modify the output path.
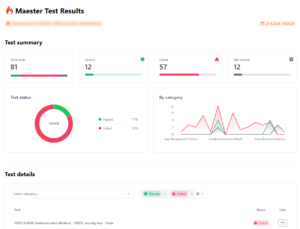
After a few seconds, it will show the results and open a HTML-Report:

By scrolling down you can see the results and by clicking on the info button for each test, you can see the detailed information on the test.

Based on these results you can harden your tenant.
In my next post I will explain how to automate the assessment with Azure DevOps
Thanks to Merill Fernando, Fabian Bader and Thomas Nuanheim for developing this Tool!
